The short answer
You can hang art in a rental without drilling by matching the method to the weight. Use adhesive picture-hanging strips for light pieces (unframed prints in lightweight frames, or small framed works well under the strip's rated load), a picture rail if your home has one, or lean larger framed pieces on a sideboard, mantel or the floor. For anything big and glazed, ask your property manager in writing for a single picture hook: in Victoria renters can install picture hooks on most walls without consent, and in NSW a landlord cannot unreasonably refuse one.
Renting does not mean living with bare walls. It does mean thinking about two things before you buy: how much the piece will weigh once it is framed, and what you are allowed to put into the wall. Get those right and you can hang almost anything, from a small print in a hallway to a statement piece above the sofa, and still get your bond back.
This guide covers every no-drill method that actually works, the weight limits that matter, what Australian tenancy rules say about picture hooks, and which print sizes suit each method.
Step one: estimate the weight before you choose a method
Almost every failed no-drill hang comes down to weight. Adhesive strips, hooks and rails all have limits, and framed art is heavier than people expect because of the glazing.
A useful rule of thumb: glass weighs about 2.5 kg per square metre for every millimetre of thickness. A piece of 2 mm glass measuring 0.5 m² weighs roughly 2.5 kg before you add the frame, backing board and paper. Acrylic weighs a little under half as much as glass of the same thickness, which is one reason we use shatter-resistant acrylic on our two largest framed sizes.
Unframed prints weigh almost nothing. That makes them the most flexible choice for renters: you can put an unframed print in a lightweight frame of your own, hang it with strips, and take it all down without a mark when you move.
Checklist
- Know the approximate weight of the finished piece (ask the seller if you are unsure).
- Check your wall surface: painted plasterboard, rendered masonry, exposed brick, wallpaper or tiles each behave differently.
- Read your lease and, if you are in a strata building, the by-laws.
- Check whether your home has a picture rail near the ceiling.
- Measure the furniture you might lean art on: width, depth and height.
- Photograph the wall before you start, so you have a record for your exit inspection.
Method 1: adhesive picture-hanging strips
Interlocking adhesive strips (the hook-and-loop style sold at hardware and office supply stores) are the best-known no-drill option. The large size of the most common brand is sold in Australia rated to hold up to 7.2 kg when you use the full set of strips as directed. That rating assumes ideal conditions, so treat it as a ceiling, not a target.
How to do it properly
- Clean the wall with isopropyl alcohol (rubbing alcohol), not a household spray cleaner, which can leave a film. Let it dry.
- Press the strip pairs together first, then stick them to the back of the frame: two near the top corners and two lower down the sides is a stable pattern.
- Mark your height with painter's tape. Aim for the centre of the artwork at about 145 to 150 cm from the floor, or 15 to 25 cm above the top of a sofa or bedhead.
- Press firmly for 30 seconds at each strip, then pull the frame away from the wall, leaving the wall halves stuck on. Press those for another 30 seconds.
- Wait an hour before rehanging the frame onto the strips, so the adhesive can bond.
- To remove, pull the release tab slowly straight down along the wall, never outwards.
Where strips fail
- Textured, rendered or bagged walls: the adhesive only touches the high points.
- Wallpaper, brick and tiles: most manufacturers say not to use them.
- Freshly painted walls: the paint needs time to cure first; check the packet for the waiting time.
- Humid rooms: bathrooms and laundries weaken the bond, and they are not kind to framed paper either.
- Heat: a wall that bakes in afternoon sun can soften adhesive. In a west-facing room, choose a lighter piece or another method.
Best for: unframed prints in lightweight frames, and smaller framed works. Our framed 30 × 42 cm print is a sensible size to try with strips, as long as the weight sits comfortably under the rating.

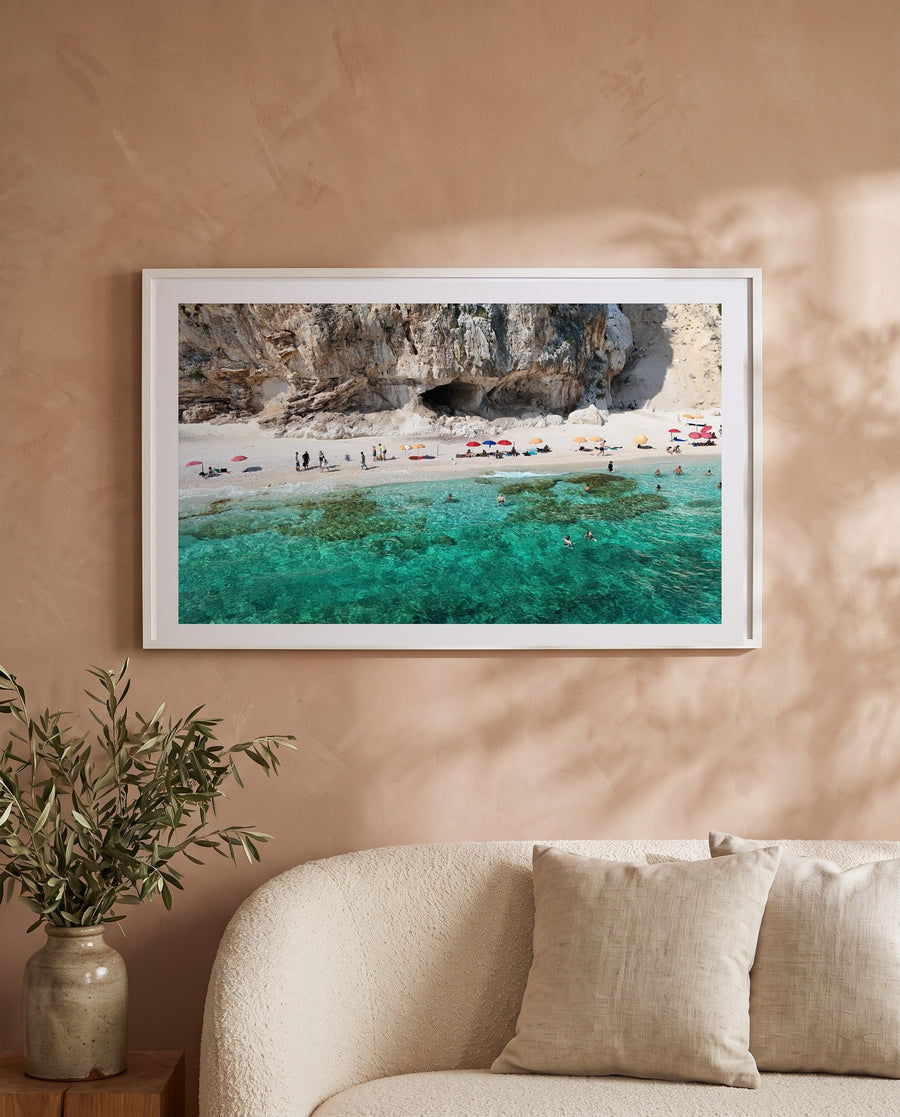
Turquoise Shore, Sardinia above a sofa. In a rental, a piece this size is best hung from a single approved hook or a picture rail rather than adhesive strips.
Method 2: the picture rail
Many older Australian homes, especially Federation and interwar houses and flats, have a timber picture rail running around the room below the ceiling. It was designed for exactly this problem: hanging art without making holes in the plaster.
- Buy picture rail hooks that match the profile of your rail (take a photo of the rail to the hardware store).
- Hang the frame from clear nylon cord, steel wire or chain. Use two hooks and two cords for anything wider than about 60 cm, so the frame stays level.
- Check the weight rating of both the hook and the cord.
- Expect the frame to tilt forward slightly at the top. A small felt or rubber bumper on each lower corner keeps it sitting neatly against the wall.
A picture rail lets you hang heavier framed works than adhesive strips, and you can move them around as often as you like. It is also the easiest way to build a row of prints along a hallway.
Method 3: lean it
Leaning is the most underrated option for renters, and it suits larger pieces that are too heavy for strips. It also looks relaxed and deliberate when it is done well.
On a sideboard, console or mantel
- Scale: aim for artwork roughly half to two-thirds the width of the furniture. On a 160 cm sideboard, a piece around 80 to 105 cm wide looks right.
- Depth: you need at least 25 cm of surface depth so the frame sits at a gentle angle without sliding.
- Grip: put a strip of non-slip drawer liner or two small rubber bumpers under the bottom edge.
- Layer: overlap a smaller print in front of a larger one, or add a lamp or vase to one side so the arrangement looks styled rather than parked.
On the floor
A large framed piece leaning against the wall on the floor works in living rooms, bedrooms and at the end of a hallway. It suits our 83 × 118 cm and 100 × 150 cm framed sizes, which have a deeper 45 mm frame and shatter-resistant acrylic, so they are stable and safer if knocked. Put rubber bumpers on the lower edge, keep it out of walkways, and skip this approach if you have toddlers or a boisterous dog. If you live with small children, secure anything large that could tip.

Faraglioni Rocks, Isle of Capri in a bright living room. One large piece usually looks better in a rental than several small ones, and needs only one hook.
Method 4: ask for one hook
Often the simplest answer is a single, well-placed picture hook. One small hole is easy to fill when you leave, and it lets you hang a substantial framed work safely.
What the rules say
- Victoria: Consumer Affairs Victoria says renters can install picture hooks or screws for wall mounts on all surfaces except exposed brick or concrete without the rental provider's consent, unless the property is on the Victorian Heritage Register. For brick or concrete, you need consent, but it cannot be refused without good reason. Avoid any material that may contain asbestos.
- New South Wales: installing hooks, nails or screws for hanging paintings and picture frames is listed as a minor change that a landlord cannot unreasonably refuse. Heritage properties are excluded, and strata rules may also apply.
- Queensland and other states: rules differ, so ask your property manager in writing before you put anything into the wall.
Rules change and every lease is different, so treat this as a starting point and check the current guidance for your state. Keep a copy of any written approval, and fill and touch up holes before your exit inspection unless you have agreed otherwise.
A message you can send
Keep it short and specific: "Hi, I would like to hang one framed artwork in the living room, centred above the sofa. I plan to use a single picture hook rated for the weight, and I will fill and touch up the hole when I move out. Please let me know if that is OK." Specific requests are easier to say yes to.
Which print size suits which method
All our prints are sized by the image; every print also has a 5 cm white border. Prices are in AUD, including GST, with free delivery Australia-wide.
| Image size (cm) | Unframed | Framed | Best renter-friendly method |
|---|---|---|---|
| 30 × 42 | $169 | $389 | Adhesive strips, a picture rail, or leaning on a shelf or bedside table |
| 47 × 66 | $229 | $539 | Strips if unframed in a light frame; picture rail or leaning if framed |
| 66 × 87 | $279 | $699 | Picture rail, leaning on a sideboard, or one approved hook |
| 83 × 118 | $329 | $999 | One approved hook, or lean on the floor or a low, deep sideboard |
| 100 × 150 | $499 | $1,459 | One approved hook, or lean on the floor (we recommend framed at this size) |
Not sure what size suits your wall? Every product page has a "See it to scale" view that shows your chosen size above a 2.2 metre sofa, and our framing page explains the frame and glazing options. For general height and spacing rules, see our guide to how to hang wall art.
Worked examples
A queen bedroom with plasterboard walls
A queen bed is about 153 cm wide. A single 47 × 66 cm print in landscape is a little small on its own, so this is a good place for two prints side by side: two unframed 47 × 66 cm prints in light frames, hung with adhesive strips about 5 to 8 cm apart and 20 cm above the bedhead. Our pairs are designed for this, and cost about 10% less than two singles. Our guide to styling a pair of prints covers the spacing.
A living room in a 1920s flat with a picture rail
Use two picture rail hooks and two lengths of cord to hang a framed 66 × 87 cm print centred over the sofa, with the bottom of the frame 20 cm above the sofa back. Add bumpers to the lower corners. No holes at all, and you can move it to another wall in five minutes.
An apartment with rendered walls and a strict strata
Strips will not grip rendered walls, and the strata may not allow holes. Lean a framed 83 × 118 cm print on a deep, low sideboard, or on the floor at the end of a hallway, with a lamp and a vase to one side. It reads as a deliberate design choice, not a compromise.

Portofino From Above. A single landscape print centred over the sofa needs just one hook, or two cords from a picture rail.
Common mistakes to avoid
- Trusting the maximum rating. Leave plenty of headroom below an adhesive strip's rated load, especially in warm rooms.
- Using strips on the wrong surface. Render, wallpaper and brick will let you down, usually at 3 am.
- Too many small pieces. A cluster of small frames means many strips or holes. One larger print has more impact and needs a single fixing.
- Leaning art where it gets bumped. Keep it out of walkways and away from doors that swing.
- Hanging paper art in the bathroom. Humidity is hard on paper and adhesive alike. See our guide to caring for prints in coastal homes.
- Forgetting the exit inspection. Keep your approvals, remove strips slowly, and fill any holes neatly.
Why unframed can be the smart renter's choice
If you move every year or two, an unframed print is light, easy to pack and adaptable: frame it simply for strips in this home and properly for a hook in the next. If you would rather it arrive ready to hang, our framed prints come in a white timber frame with a 5 cm white border, and the largest sizes use lighter, shatter-resistant acrylic. Our guide to framed vs unframed prints compares both in detail.
Shop the edit


Spending $700 or more on prints? Add any 30 × 42 cm unframed print to your cart and it is free, which makes a handy small piece for a shelf or bedside table. See the offer details.
Frequently asked questions
Can I hang a large framed print with adhesive strips?
Usually not. Large framed works with glazing often weigh more than adhesive strips are rated for, and a fall can damage the frame, the wall and the floor. For large pieces, use a picture rail, lean the work, or ask for a single picture hook.
Am I allowed to put a picture hook in my rental?
It depends on your state and property. In Victoria, renters can install picture hooks on most surfaces other than exposed brick or concrete without consent, unless the property is heritage-listed. In NSW, a landlord cannot unreasonably refuse a request for picture hooks, except for heritage properties. Elsewhere, ask your property manager in writing.
Will adhesive strips damage the paint?
Used correctly on a sound, cured, painted surface and removed by pulling the tab slowly down along the wall, they usually come away cleanly. Poor-quality or freshly applied paint can lift. Test a strip somewhere discreet first.
What is the best size print for a rental?
For strips, 30 × 42 cm framed or a lightly framed unframed print up to 47 × 66 cm. For a statement piece, 66 × 87 cm or larger on a picture rail, a single approved hook, or leaning on furniture.
How long does delivery take?
Each print is made to order and finished by hand on the Gold Coast, which takes 5 to 10 business days (framed a little longer). After dispatch, unframed prints take 2 to 7 business days and framed works 7 to 10. Delivery is free Australia-wide.
Renting and unsure what will work? Send us a photo of your wall and we'll mock up any print at true scale, free, so you can check the size before you commit. Request a free mock-up or try the wall tool.